
We are here to help!
Let us help you find the answers you need,
please select from the options below. We are always an email
away if you don't find what you are looking for
Getting started & installation instructions
Click here for detailed instructions on how to get started with Skipper Family™
Feedback
Did we miss anything? Do you have any idea? Want to request a movie? Please let us know how we can do better
Getting started
Installation
Skipper installs in under 1 minute on Mozilla Firefox™ or Google Chrome™ by the use of a browser extension (it is like a plug-in). If you don't have it already, you may download either browser by clicking one of the logos below
Then, according to your browser, download Skipper Family™ from the adjacent logo
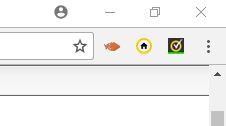
Once Skipper has downloaded, our logo (orange arrows) will appear in the top right corner of your browser (Like the example here). This is where you will access Skipper going forward.


Chrome

Firefox
Account setup
Now, let’s get started creating your account! Click on the Skipper logo in the top right corner of your browser. Once it’s selected, a window will pop up asking for your email address and password. Select “Sign-up for Skipper”
Enter the same email you used when purchasing your product, and enter a password you can remember. Don't worry, we can always help you recover your password if your dog misplaces it. You will get an email with a 6 digit code. Enter that code into the Skipper extension. Then sign in with the email and password you just created.
Using Skipper
Once you’re signed in, you will see a toggle button that says “Skipper” above it. When the toggle is blue, that means Skipper is turned on and you can use our filters. If the toggle is red, that means Skipper and our filtering is completely off.
You will see many toggle buttons throughout as this is how you can control when a filter is ON or OFF – you have complete control over what to be played, just as if you had a remote control in your hand:
- Blue means the filter is ON, therefore the referenced content will be filtered out
- Gray means the filter is OFF, therefore the referenced content will remain
The hamburger menu
Right under the Skipper logo you will see a dark-gray circle with 3 horizontal lines, this is the hamburger menu. When selected, it will show you a few convenient shortcuts:
- Channels – Select to see the movie selection available to you
- About – Everything you may want to know about Skipper
- Feedback – Is there something we can do better? Do you have an idea to incorporate? Would you like to request movies or shows to be added? Did we miss anything?
- Help – Shortcut to the whole Help section
- Sign out – Allow you to sign out of Skipper, most users never sign out and simply turn Skipper off if needed
Filtering
You have 4 different ways to use Skipper filtering: Standard Filtering, User Presets, Channels, and Advanced Filtering; we will discuss each of them.
The Standard Filter
– This is the out-of-the-box way to use Skipper. Settings have been already programmed in four different categories: Kids, Pre-teens, Teens, and Adults. These presets are based on Skipper’s community opinions and focus groups. We do not claim to know better, this is just a starting point – if you like you can take one of the Standard filters and modify it as a user-preset to fit your own taste.
To view what filters are chosen for each setting, select the setting you’d like to see. For example, if you select the “Kids” filter, you would then select “Advanced Filtering”. From there you would see Language, Sexual Content, etc. To view a filter in more detail, select the arrow next to the filter theme (for instance, Language, Sexual content, etc.) Every selection that is toggled to blue means that that filter is turned on for this selection.
User Presets
– You can also create your own filters for your family’s preferences. If you look at the section under “Standard Filtering,” you will see a section called “User Presets.” This is where you create your own programmable presets for the scenarios you want.
In order to create your own presets, you first need to select one of the blank “bubbles” under User Presets. Once a bubble is selected, you will see an “Edit” button appear in the top right of that section. Select the “Edit” button.
Once you select “Edit,” you can then name your preset. Start typing in the blue bubble to create a name for your preset. For example, “Grandparents.”
At this point, the Advanced Filtering
section will be visible to you and you can start choosing the filters you want included in this preset. To turn filters on and off, use the toggle switch. Blue means that the filter is on, gray means that the filter is off. Select only the things you want to be filtered out for this preset. You can always modify or make other presets later on.
Once you’ve chosen all the filters, select “Save” in the upper right corner under the section of User Presets.
And that is your new preset! You can change them anytime by following the same instructions.
Channels
– Skipper Family™ is our core default channel and it will be what most subscribers will use. In some cases, Skipper allows communities to create specific channels for their viewers. This section will notify you when a special channel is active – this section will be empty when the default channel is in use.
We will not mess up!
Let us know how we can help by using the form below!